Search the Community
Showing results for tags 'subs'.
-
I've had a few good finds already, particularly after a week of heavy rains a month ago. Seems to be better when there are multiple days of soaking rain or continual damp humid conditions (fog, mist, showers). Cold nights but maybe not frosts. I didn't find much after random showers since then, even though its been misty, except in a garden mulch bed that gets sprinklers. Really need that saturation What do you guys think? Optimal mm of rain and humidity %
-
(PLEASE NOTE THE SPECIES USED WAS STROPHARIA PLEASE DO NOT ATTEMPT THIS WITH ANY KIND OF ILLEGAL MUSHROOMS PICTURES ARE FOR ILLISTRATIVE PURPOSES ONLY) This is my guide to growing woodloving mushrooms outdoors i hope this will be of help to anyone new to the subject and also serve as inspiration for others wanting to try and create thier own outdoor patches in a lovely garden setting this has proved very successful for me in the past and i wanted to share with you all the way i make this happen. this will serve as a complete guide to growing your own woodloving mushrooms outdoors i hope you all find this informative and as i said earlier inspiring...... enjoy throughout this guide i will be showing you some different techniques i have used in the past so this is how it all starts you can begin with either 1: freshly picked specimens or 2: pieces of wood that you know for sure already contain mycelium of the mushrooms you intend on growing so we will begin with number 1: freshly picked specimens for this method i like to take my fresh specimens and rather than using just the stem but i cut the mushroom into 3 pieces so that i end up with the stem but, the stem and the cap get yourself some cardboard and tear the outer layers away so that you are left with just the corigated middle part you can soak this in some boiling water to try and get rid of some of the excess glue however this is not at all necessary place your mushroom pieces inbetween your wet cardboard i like to start small with some small plastic containers allow the mycelium to take over the cardboard as you see in the picture below (the black parts you see are just old rotting pieces of mushroom this has no effect on mycelium growth and has never caused any kind of mould growth for me i have done this numerous times without a problem) the mycelium pictured below is from an unidentified species i discovered last season after this i then take the step to a larger tub (pictured below) firstly i will add more larger pieces of cardboard into the tub and spread my smaller cardboard pieces throughout the layers once these larger cardboard layers are colonised i then get wood chips and basically make a lasagne by pulling the large sheets of cardboard out and placing woodchips between the cardboard layers and again leave this to colonise once this is colonised i make my outdoor beds i do this by simply placing as many layers of cardboard on the ground as possible (this also acts to stop the weeds growing in your garden) take your colonised chips and cardboard and spread it out over the cardboard you placed on the ground your new garden bed is on its way i now take some fresh woodchips and layer them over the top about 1-2 inches is good it should look something like this now if we go back to the start this time we will begin with option number 2: pieces of wood that you know for sure already contain mycelium of the mushrooms you intend on growing pictured below is wood containing mycelium in this case you can simply take your colonised wood and place chunks of it around in your outdoor woodchip patch just like this then ofcourse simply bury it in your woodchip bed and allow the mycelium to spread throughout the bed now this next method is something i devised using the idea of the spawn plug tek this method has worked extremely well for me get yourself some logs drill some holes throughout the logs and place either colonised cardboard, woodchips or even stem buts inside the holes i like to then plug the holes up with some pieces of fresh uncolonised cardboard this should last long enough to allow the mycelium to take over the log from the inside out you can see in the picture below where i have drilled holes in this particular log then take your colonised log and simply bury it in your woodchip beds i like to just bury it halfway like this i then take this log and move it around my garden every year or so within a few months the mycelium from the log will spread like crazy into your woodchip bed this log has been in this particular spot for around 7-8 months as you can see from the pictures below the mycelium has spread outwards from the log quite dramatically so thats basically it a very simple way to create not just outdoor beds for woodlovers but to make a beautiful garden that grows your favorite woodloving mushrooms thankyou all for reading i hope you found this informative and inspiring (AGAIN PLEASE NOTE THE SPECIES USED WAS STROPHARIA PLEASE DO NOT ATTEMPT THIS WITH ANY KIND OF ILLEGAL MUSHROOMS PICTURES ARE FOR ILLISTRATIVE PURPOSES ONLY)
- 18 replies
-
- 15
-

-
- woodlovers
- subs
-
(and 8 more)
Tagged with:
-
Had a bit of a eureka moment on the weekend when doing some gardening. Hit upon the idea of using egg cartons as a means of creating, storing and transporting woodloving mycellium. The idea would be to create easily transportable blocks of mycellium that can then be used in a similar way to turfing a lawn with pregrown chunks of lawn grass. Bury three or four (or even one) of these colonised egg cartons in a mulch bed and you'd be well on your way to establishing a power patch. Note: This is a trial. Stay with me as I update with progress..... 1. Soak some egg cartons in water. I happened to have an old styrofoam container that has collected rainwater and been used for transporting woodchips. Hence the water in the tub contains lots of small pieces of woodchip as well as a few thousand spores. I don't think this is crucial but it can't hurt overall. 2. When the egg cartons are nice and soggy and soaked, take them out and sprinkle woodchips over them. Try and get a little bit of woodchips in the egg holes and pat them down nicely. If you have sawdust, I'm sure that would work just as good if not better. 3. Sprinkle woodchips or substrate that have been colonised by woodloving mycellium over the top of the woodchips. The more the merrier but if you've only got a little bit, it can go a long way if used properly. 4. Put a fresh layer of uncolonised woodchips or substrate over the top and put another egg carton over that. Sit it aside in a nice shady space, preferably with woodchips underneath. Leave it alone and keep it damp. In theory...the mycellium will spread across the woodchips and even into the egg carton. The spaces left for eggs in the carton will create nice air patches to prevent the mycellium from getting too wet and soggy. This is the problem I run into when working with straight cardboard colonisation. There's not enough air to get through the cardboard and things can get soggy and messy and the mycellium will stall. Overall you should easily be able to stack a dozen or so of these somewhere in your garden until they are fully colonised. Once you have a fully colonised carton you can cart if off (no pun intended) to a nearby woodchip patch and bury it. You can plant the whole thing or take the top layer off and start a whole new one, as the top layer will have plenty of mycellium working through it. Will keep you updated with my progress.
- 5 replies
-
- 1
-

-
- woodlovers
- subs
-
(and 2 more)
Tagged with:
-
Hi all just wondering if anyone has experience with substrates other than woodchips/cardboard/hessian or sawdust when working with wood loving species. In particular I'm wondering if coir will work? If no one knows I'll get to work on it and see if it's viable. If someone has already tried or has experience with other substrates let me know! Thanks!
- 12 replies
-
-
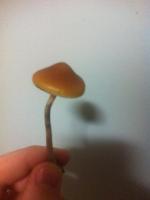
Hi guys, first post on these forums I found a few little mushrooms on my sisters property in stoneyford, about 20 minutes drive west of colac. The forest where I found them is made up of mostly gum and blackwood trees. I found multiple small patches mostly between rocks in low lying damp areas. They are only small, the biggest one I found had a cap about the size of a 50 cent coin. The stems are all fairly thin and the gills are a yellowish colour. The colour of the caps look the same as most pictures of subs I've seen and the stems bruised blue. The only thing different from the description of subs on these forums are that the stems are really thin, rather then the thick meaty looking ones I have seen photos of. I've never taken shrooms before and only know what i have read on these forums so I'm a bit wary of them. I'l post a picture, any help would be appreciated . Thanks guys.
- 15 replies
-
- identification
- id
-
(and 5 more)
Tagged with:


